I would like to upgrade my ’68 Coronet
Super Bee (383) from 0.88˝ to 0.96˝ torsion
bars. How hard is it to swap them?
Anything else need to be removed? Any
of your famous tips or tricks?
It is really pretty easy, especially when
compared to Phords and Shivvys (coil
springs). You need not even remove the
wheels! Here’s an abbreviated step-by-step,
find photos below.
- Measure and record the ride height, at
any convenient point, on both sides of
the car. - Jack up the car and place jack stands
under the rails. Wheels must not be in
contact with ground (i.e., no ramps,
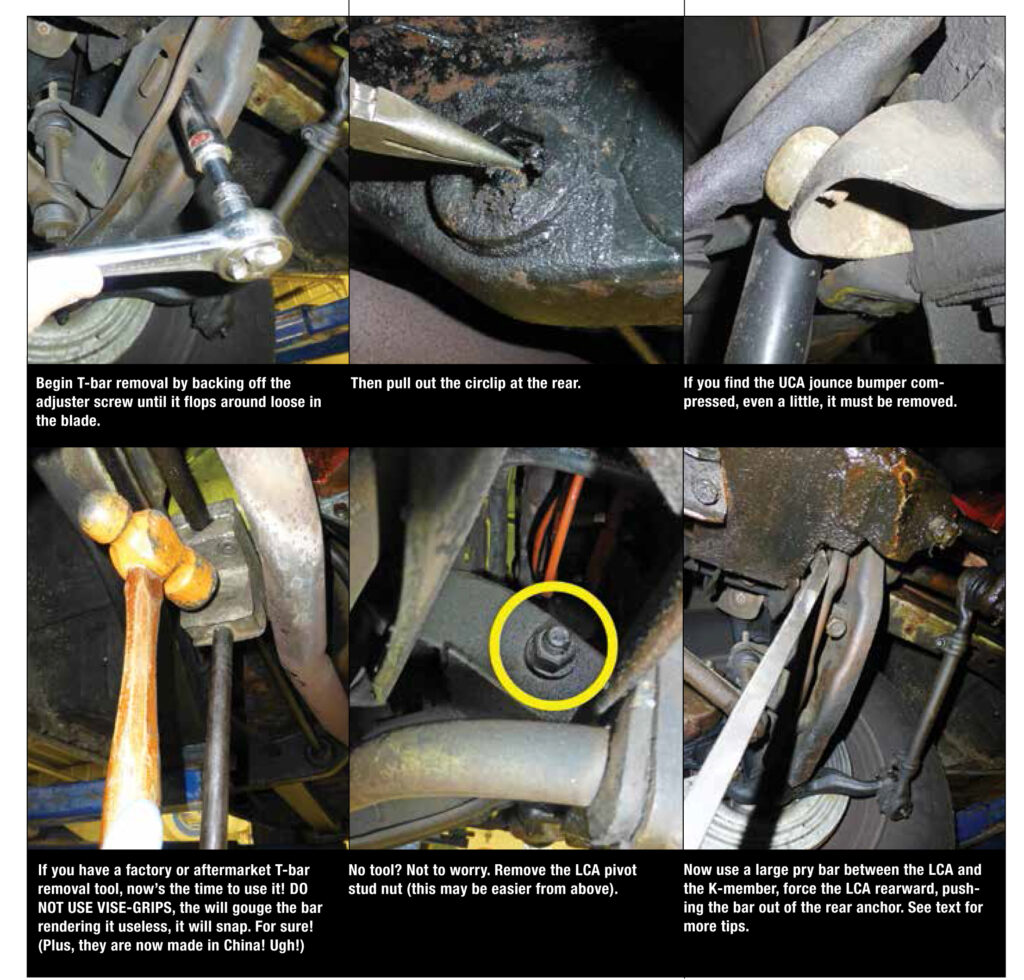
drive-on lifts, etc.) - Back off the T-bar adjusting screws
until they flop around loose. - Look at the upper control arm rebound
bumper. If it is touching the upper control
arm, get the wheels contacting the
ground again, remove the bumpers,
then re-elevate the car. - Remove the circlips at the back of the
bar(s). Any pliers will work for this. - If you have the factory or aftermarket
tool, clamp the bar in any convenient
spot, then hammer rearwards. Basically,
you are done.
6A. Lacking the factory tool, remove the
lower control arm stud nut, place a very
large pry bar between the lower control
arm and the K-member. Pry rearwards,
the bar will pop out, if it doesn’t move
rearwards enough, you may need to
loosen the tension strut hardware, or
grasp the rear hex with a very large
water pump pliers and pull it out.I
Installation is basically the reverse: - Clean old grease from both hex sockets
front and rear. - Slide boots on the new bars. There is
no front or rear, only left or right. All
OEM bars are marked “R” and “L”, and
the lower P/N (the even number, too) is
always the right side. - Slime some long-fiber sodium grease
- in the front socket (Mopar P/N
- 4897841AA), slip the bar in, pack the
- rear anchor totally FULL of grease.
- Hammer it in as far forward as it will go,
- slip the boot on, install circlip.
- Adjust ride height. If you duplicate the prior dimensions, no front end alignment will be necessary.