
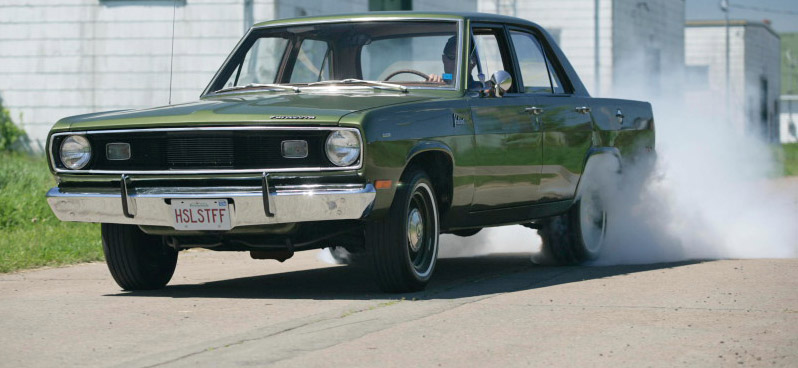
trouble blowing away the skinny tires. A 4-door, set up
with a high center of gravity, this is more a straight-line
budget bashe
Alan Harper is our kind of guy.
Cheap!
Not only is he cheap, but he’s hands-on
and innovative, which sets him apart from the
here’s-my-checkbook-build-me-something-totally-absurd
kind of guy. Living up in Salisbury, New Brunswick,
Canada, where the principal staples are cold air and
rust (with global warming, Canadians may have to start
importing cold air), finding any decent A-body projects
gets more difficult with each passing hour. So when Al
saw a stock ’71 318 Valiant back in the fall of ’04, he figured he could do something with it.
Basically a solid parts car that “wasn’t rotten underneath”
(had good rails and K-member), the stock Plymouth had a
perfect running engine, a 904 trans, 7¼˝ rear, and a good
original interior if you overlooked the worn front seat bun
and tear in the rear seat. The fenders and quarters were
trash, the front bumper and grille was missing, and a rear
wheel had come off at speed and had torn off a chunk of
the quarter on its way to smashing itself up into the trunk.
Al beat the owner down to $400, trailered the car home and
parked it.
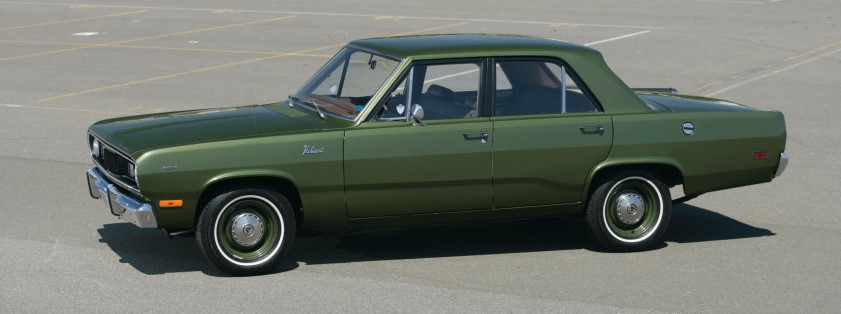
wheels (’69 Dart) are a correct option
size for the Plymouth. Paint mimics
our own Green Brick.
Fast forward (or shuffle forward if you’re geezers like us)
to May ’07. Al gets a phone call from his uncle, Sam Harper.
Sam used to work for Chrysler back in the ’60s and picked
up a few tricks in his day. Sam also raced in Super Stock—a Dart in ’77, and later, a Mirada CMX (in NHRA
GT class). Sam did well on the track and was
the type of guy to make his own stuff. We
bring that up not just to fill space (which it
does rather nicely, we think), but because it
works into the story later on, if you have the
attention span to stay with us.
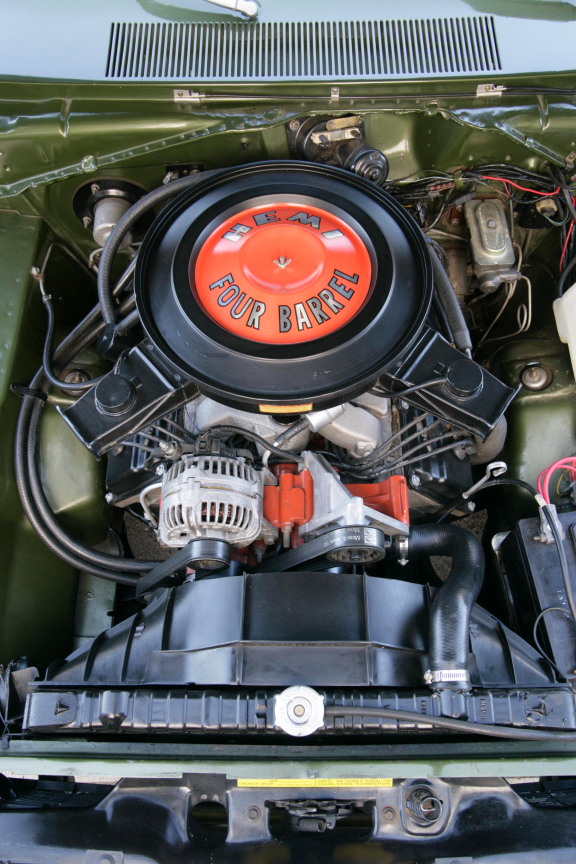
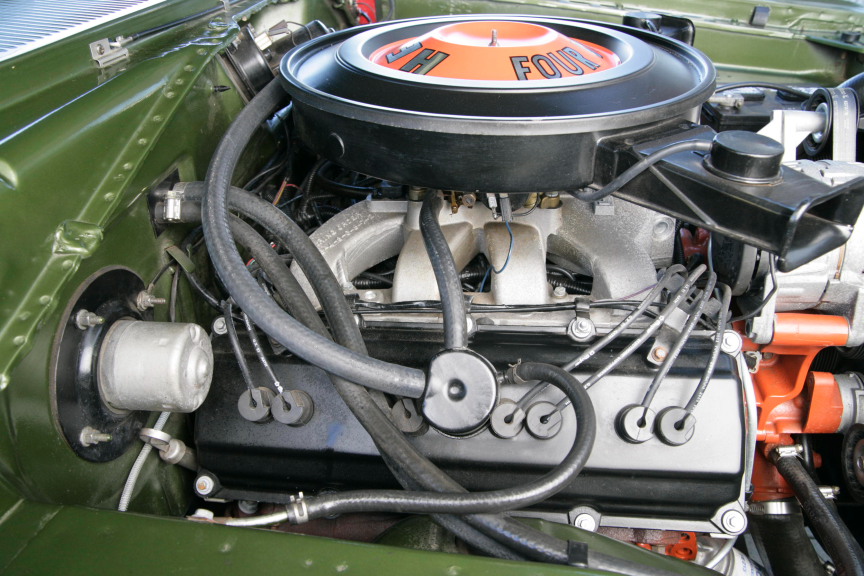
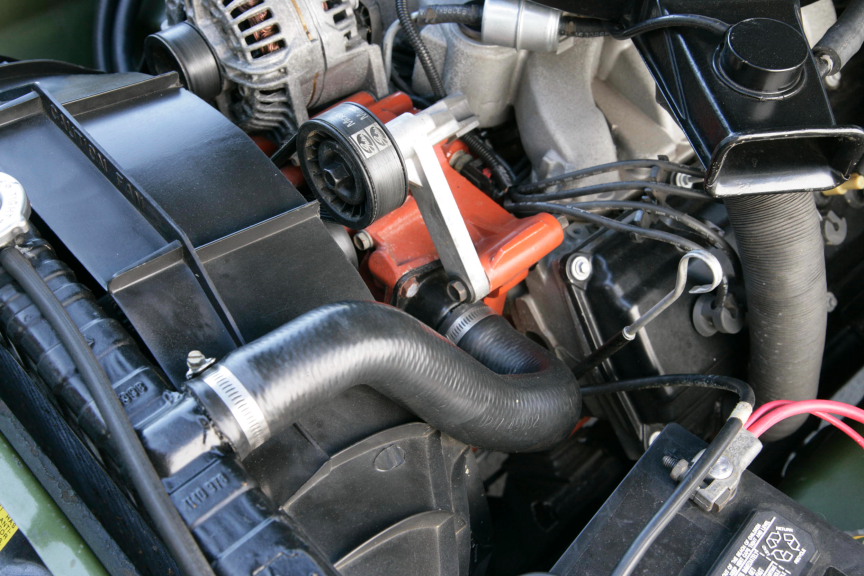
Valiant—a mix of Hemi and smallblock pieces. The “WWFD” appoach, which we like –
“what would the factory do?” Al used an NOS ’71 air cleaner, with a “Hemi Four Barrel”
pie tin that’s available from Mopar Performance. Hidden coil packs and wiring add to
the illusion.

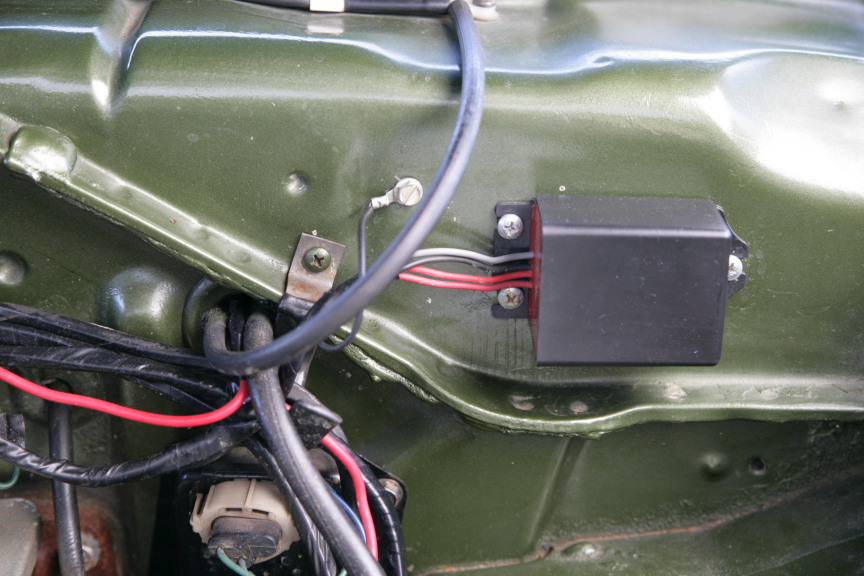
oil pressure warning light. Al tee’d the
system for a vintage S-W gauge.
So anyhow, Sam calls Al and tells him
he’s replacing a bad 5.7 Hemi that came out
of a Charger, or something, with a junkyard
5.7. The core motor—a low-miler with two
scuffed slugs has to go back to the ‘yard,
but maybe Al would be interested. Al calls
the junkman and scores the Hemi—complete
with wiring harness, alternator, the works for
$225. Needless to say, Al’s a good talker.
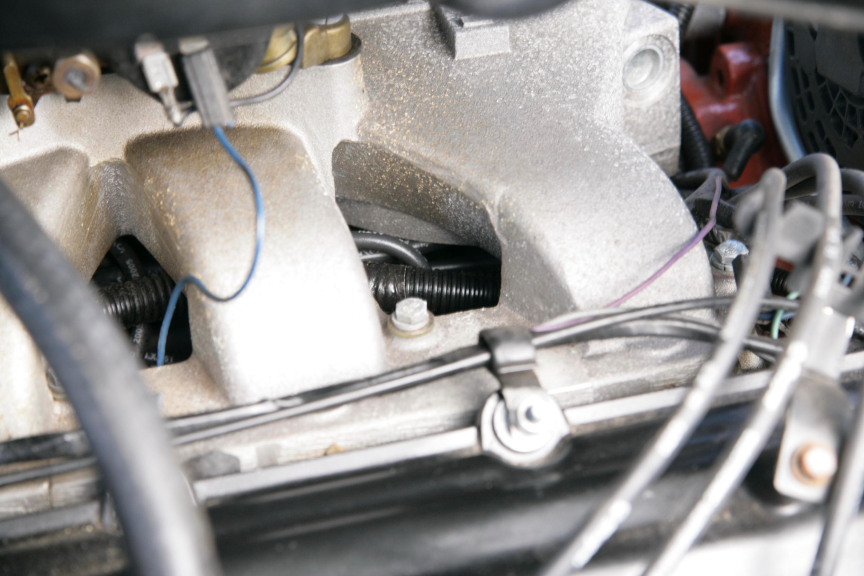
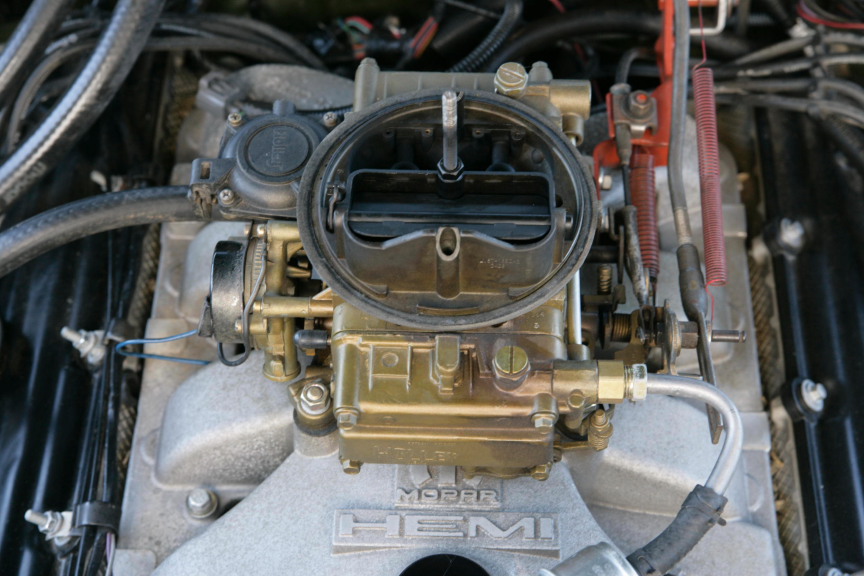
So where are the coil packs? Why under the intake manifold of course. Wires go to
the back of the engine, through the firewall to the underdash-mounted MP computer.
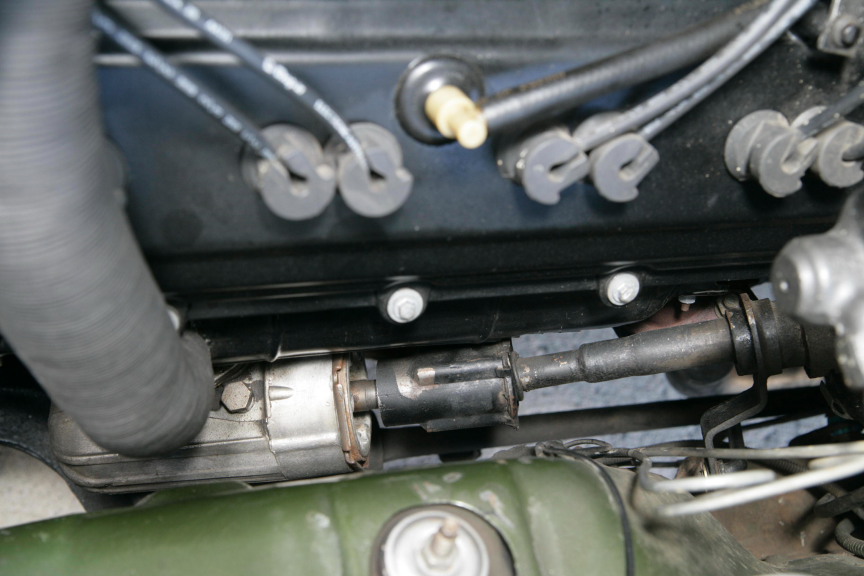
Valve covers were run under a belt sander to remove “late-model” details. Al used
stock 318 wire looms with homemade brackets. Correct breather even has hose going
to the charcoal canister in the trunk—just like the ’71, which was the first year for this
setup in Canada and the non-California U.S..
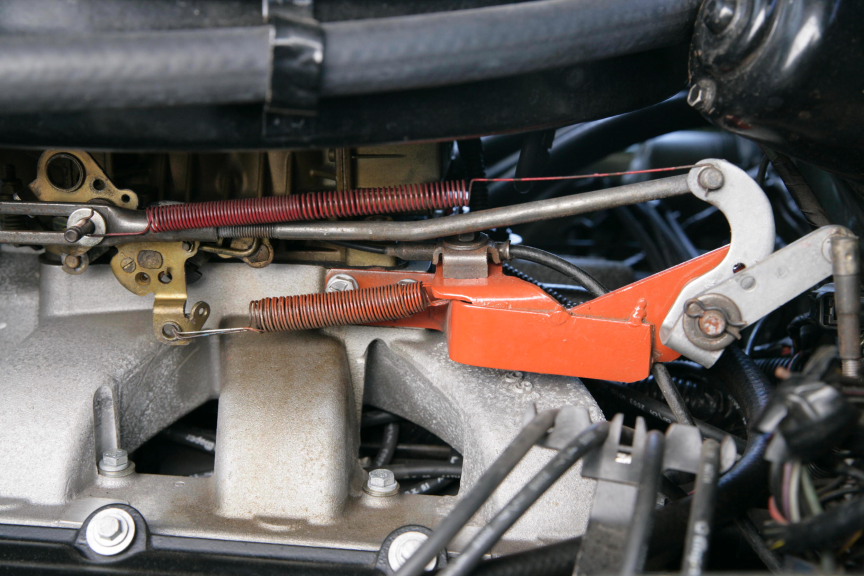
It consists of a 440 bellcrank
bracket that bolts to an existing boss on
the manifold, a 318 bellcrank and a 340
lever.
Now, Al never planned to put a 5.7 Hemi
in his Valiant, but he had this car, and now he had this engine….hmmm.
‘Course you have to realize that all this occurred before Mopar Performance came out with a kit that took a lot of the pain out of 5.7 Hemi swaps. But that didn’t deter the hero of our story. He forged ahead where others feared to tread, eh? (at least that’s the saying up in Canada. In the U.S. they leave out the “eh?” part.)
The Hemi itself fit right in the engine bay using TTI front mounts from Schumacher. ‘Course Al discovered that the swap was a lot easier if you first yanked the 318. Wanting to get as close to a stock appearance to a ’71 as possible, Al went for the crate engine carbureted intake. The 904 was deemed beefy enough after uncle Sam did some beef-up work. Rather than spring for a pricey hi-stall converter, the crafty uncle knew that torque converters for a 170-cube slant-six had a higher stall (K-factor) than a converter for a 318. So Al just bought a new aftermarket converter for the slant-six application. No way was the original 7¼˝ rear going to hold up, so a 3.55-cogged 8-3/4” rear with an Auburn cone-type Sure-Grip from a ’69 Dart was swapped in.
Al got a lot of info, such as what oil pans would fit, etc. from Hemi.com. More help came from folks who worked at Chrysler, Canada. Al was fortunate with the timing on the project, as many of the MP parts for the 5.7 swap were just starting to be released. When Al searched for the MP computer, there was only one in all of Canada at the time. Al was going to modify the flex plate to mate the Hemi to the 904 trans, when MP just came out with their own flex plate to adapt the 3G Hemi to the older transmissions.
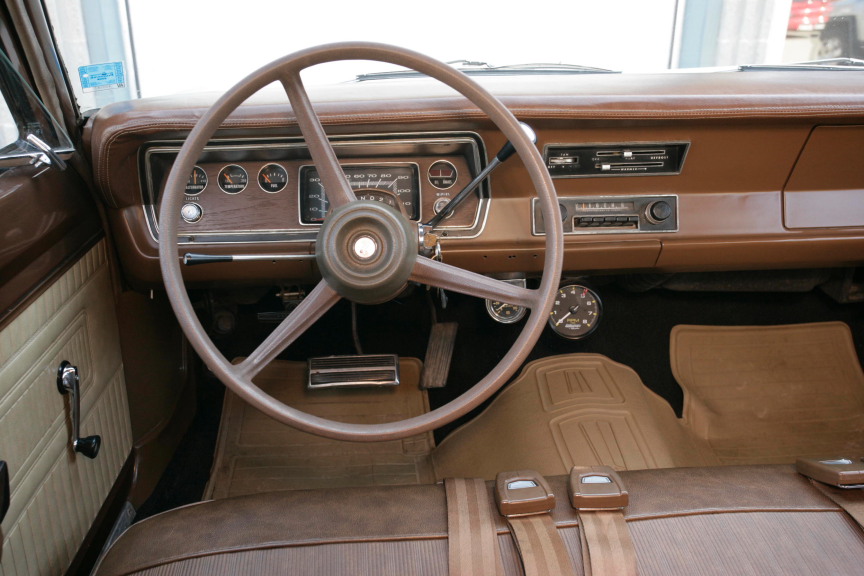
Being a 318 car, the Valiant came with the 10” drums, which remain for now. The power steering had to go because there was just no room. The manual steering box was shimmed out, and the column moved to the left for clearance. Al doesn’t know exactly how he did it, but he did—with help from the aforementioned uncle.
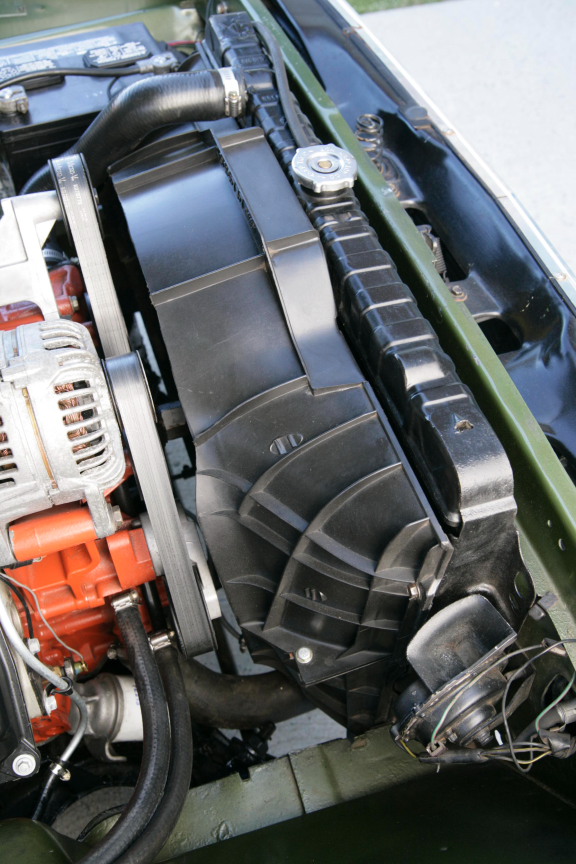
To illustrate Al’s luck with his project, when he ordered a serpentine drive belt for the engine (it’s a Viper part), he received, by mistake, an upper radiator hose. A second shipment got him the belt. He was about to return the hose, when, just for grins and giggles, he checked to see how it would line up with his ‘85 Dodge van radiator. It was a perfect fit! Checking the part nos. he found that the Gates number on the belt and the Dayco number on the hose were exactly the same! Hey, we can’t make that stuff up (actually we can, we just want you to think that we can’t).
When it all came together, Al turned the key, and the engine fired right up after about 10 cranks, and ran perfectly with just some minor carb adjustments. Al figures horsepower is in the 360-375 range, and the Valiant should crank down the quarter-mile in the high 12s on street tires and through the pipes, if it hooks up somehow. All told, the cost of the Valiant, including engine, rear, paint etc. is about 10 grand. Which is what some of the high-buck show car types just have in their key fob.