
Adding significant HP for insignificant effort – and cash—in an afternoon.
Instead of a Movie Dept
Title: Bolt-On Hop-ups
Blurb: Adding significant HP for insignificant effort – and cash—in an afternoon.
Text and photos by Richard Ehrenberg, SAE
Everybody’s always looking for the magic bullet: add 200 HP in an hour. Sure, blowers and nitrous can come close, but can have risks if not installed with due caution. Some of us are just looking for that little edge–a few dozen HP, more than, say, the neighbor’s identical vehicle. While a large number of M.A. readers are building stroker-crank, killer-head, even blown big-blocks – record numbers, in fact, there’s still a large percentage of Moparphiles who fall into that “edge” category: They just wanna bolt on some extra gitup-‘n’-go in a day. Maybe they’re low on coin. Maybe the car is their daily driver. Or, maybe they just aren’t into heavy-duty wrench-twisting. OK, we hear ya!
Think of this article as kind of a buyer’s guide with and engineering lesson and some wrenching and testing thrown in.
With the plethora of products out there, it helps to know what works and what’s so much bulldong. Rule number one: If it seems to be too good to be true, it probably is! Those little magnets for the fuel lines, pinwheels under the carb or throttle body, 18-prong spark plugs, intake gaskets with window screen in ‘em, etc., are excellent products – if you are the guy banking the fast cash! Otherwise, keep your gold card safely in your wallet.
Now, truth be told, to make any real extra HP, you need more than bolt-ons. Think of your engine as an air pump – the more air in and out, the more fuel you can burn, and the more HP you’ll make. Engineers call this improving the volumetric efficiency. To really ramp up the numbers, the cam’s gotta open the valves wider, hold ‘em open longer, the head’s ports need to be larger, the engine needs to rev higher, etc. But, back to that “edge” concept, it’s certainly possible to make a noticeable difference in an afternoon, on little more than pocket change. And, as a tempting bonus, these bolt-on swaps can, if carefully conceived and properly executed, improve fuel economy, too. Just, please, don’t succumb to the magic-bullet temptation: Two 1000 CFM carbs on a tunnel ram will not make your stock 318 faster!
Also bear in mind that factory hi-po packages generally have pretty good stuff as part of that package, and as a general (but certainly not rock-solid) rule, will be a bit harder to easily extract more ponies from.
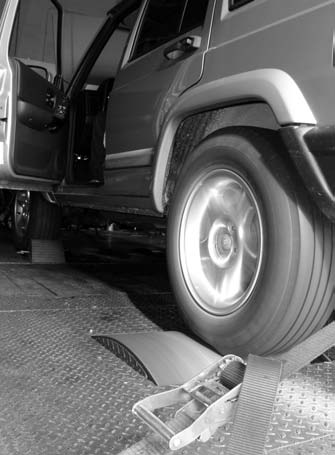
Our hands-on test vehicle is a modern SMPI Mopar, but
bolt-ons of this type apply to virtually anything wearing the Pentastar or DCX
logo.
As usual, we’ll discuss the theories here, and the greasy-fingernails part will be in the photos and captions.
GROUND RULES
First of all, we’ve gotta decide: What’s a bolt-on? Generally, anything you can do that can be installed “by itself”, that makes or needs no other changes to the engine or drivetrain, and can be done in an afternoon under that famous shade tree with a $25 Chinese tool set makes the cut. Things like camshafts are out, because you need to worry about valve-to-piston clearance, coil bind, rocker geometry, etc. Head swaps are out, too, mainly because of the semi-major price and time factor. Transmission shift kits and rear axle ratio swaps could make the grade, but we’ve decided to concentrate on engine – true HP producing – upgrades. So, that leaves us with intake, exhaust, and ignition/tuning changes. On modern Mopes, your ignition base timing and advance schedule are kinda locked in silicon. True, these parameters can be changed via some aftermarket computers and/or piggyback devices. So let’s get ignition out of the way first.
IGNITION / SPARK
Classic (‘60s/early ‘70s) V8 Mopars all used a distributor with advance controlled mechanically and pneumatically. Generally, you’ll want about 35 degrees of base plus mechanical advance for best performance. Based on published stock-engine dyno data for that period, Chrysler knowingly retarded the spark at least 6 degrees from ideal, in an effort to prevent problems from extra-low-grade fuels, heavy loads, high temperatures, etc. So many engines of the day had total advance in the 28-degree range. A simple twist of the distributor can add as much as 20 HP in 30 seconds! But, of course, be aware that the octane’s gotta be there.
The advance curve (spark vs. RPM) on most performance-oriented Mopars was pretty durn good. However, many of these cars are no longer equipped with the OEM distributor, having been converted to electronic ignition, etc. So, it’s your responsibility to learn what your particular engine wants for a curve. There are many factors involved, more than we have space to fill here. Just remember that the spark needs to be fully retarded at idle, including fast idle, or the idle will be unstable. And, with any kind of performance engine, you generally need at least 10 degrees of spark at idle. So you’d want 25 degrees or mechanical advance. And so on.
Vacuum advance is another black hole. Go to the track, and
you’ll see that most of the fast cars have it plugged, or have a distributor
that’s not even equipped with it. But you need it for the street! 100%! Always!
In fact, the more the better.
If your Mopar already has a good electronic ignition system, be it aftermarket or OEM, you’re set. If you have a breaker-point system, now’s the time to go electronic. Now, realize that, advertising notwithstanding, there’s typically zero HP to be gained from ignition system swaps. This assumes, of course, that your baseline systems produced enough Joules to fire the plus, all the time, every time. If yours didn’t make the cut, you could easily find some power. However, in the performance sphere we’re dealing with here, that’s unlikely. So why should you switch? Simple. The set-it-and-forget-it factor. or, to quote Horace and John’s term: Dependability.
INTAKE
It’s at this point that we need to reiterate that “incremental improvement” idea. Since the bumpstick won’t be swapped, the engine’s basic RPM band will not change my very much – if at all. So the engine won’t be radically different. Think: “tuning”, and you are the tuner. If your 318 has a stock little 2-Bbl, either a larger 2-Bbl (maybe from a 360, 383 or 400, or a six-pack center carb) would suit, as would either a very small Holley or a demand-type Carter (T-Q). If you’re swapping manifolds, stay with dual-plane designs — stock cast iron ones were very good, generally. If you have a choice, a spread-bore (primary barrels much smaller than the secondaries) are the better bet. If you have a turbo I 2.2L, say, a larger throttle body (from, say, a V6 minivan, etc.) would be cool, as would be a change to un-ribbed (smooth) hoses. (More on that aspect in a moment.)
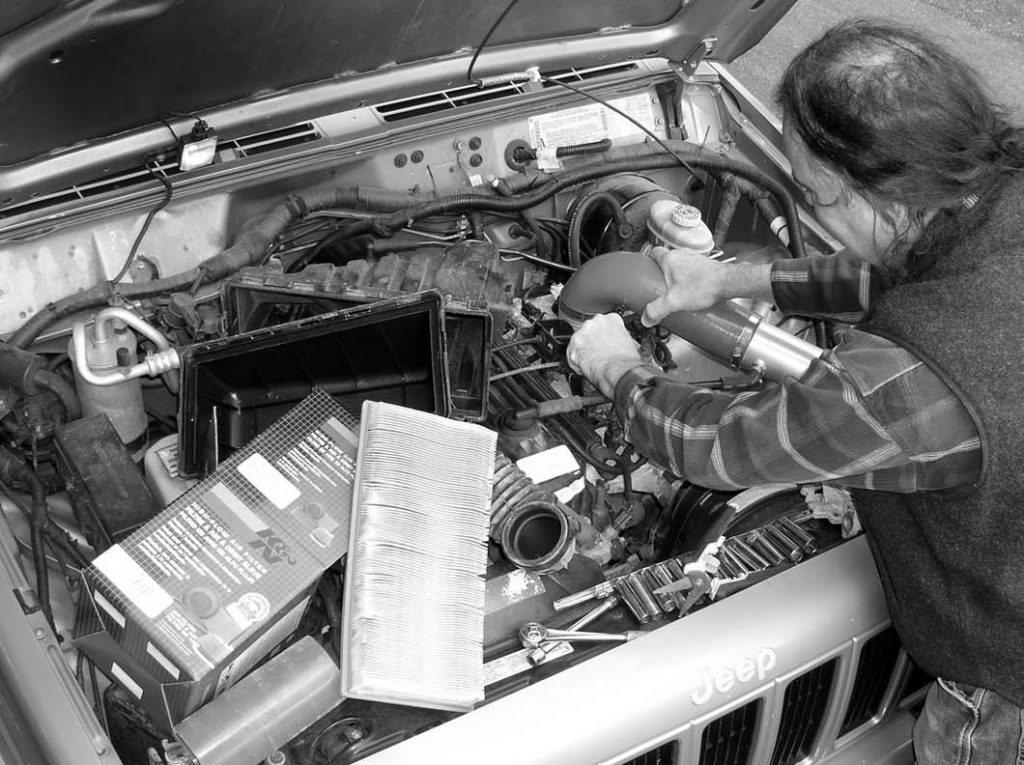
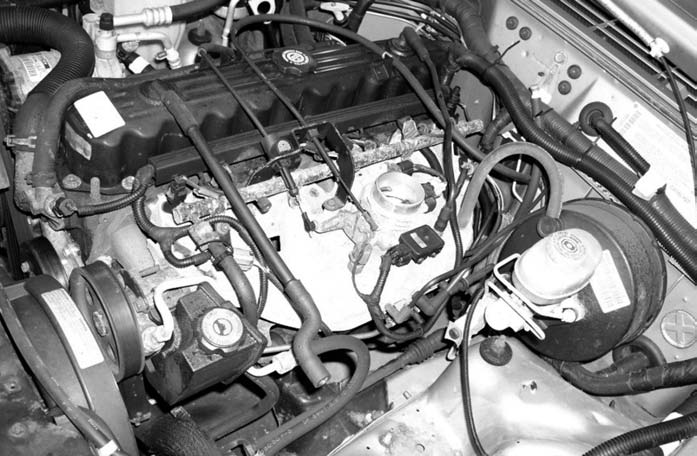
Our test mule, a 2000 4.0L I-6 Jeep, was equipped with a 60 mm throttle body, itself part of a factory upgrade from the 2″ (~51 mm) throttle body these engine had in their original EFI configuration (‘87-‘90). We decided to upgrade the TB to a ** billet CNC unit from F&B Performance. In this case, the opening in the intake manifold was too small a bore to allow the F&B T/body to properly bolt on. Since part of the parameter for true bolt-ons includes no having the car off the road for more than a few hours, we decided to procure another, identical intake manifold (junkyard, $40) and have it bored, which F&B did for us (it could just as easily be done at a local shop.) Once that was done, we bolted the new setup on as an assembly, a procedure that took less than an hour.
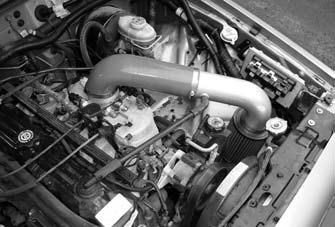
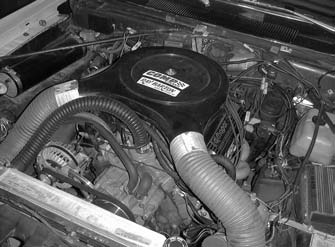
Next, we decided to remove some intake tract restriction. Most late model Mopars have the air cleaner mounted remotely, in a box, with a flat, panel-type filter element. This allows the engineers the ability to almost totally silence the intake tract. In some cases, these are not especially well designed, adding quite a bit of restriction, in a place where the engine is especially vulnerable to HP losses. In our case, the airbox itself wasn’t terrible, but the fresh-air opening was pretty miniscule, smaller than the 3″ air horn (7.1 sq. in.) or our new throttle body. Plus, the hose from the air horn to the box was heavily ribbed, creating all kinds of nasty turbulence – and turbulence is the enemy of HP production (despite what those bolt on pinwheel, screen, or carb “helix” carb spacer guys would have you believe). So, using a combination of store-bought and scrounged components (one 3″ silicone 90-degree elbow, one length of 3″ aluminum pipe, and one 3″ cylindrical oiled-cotton air filter, we rigged up our own air cleaner setup (see photos).
On classic RWD Mopes, you have options up the yazoo. On base models with silenced air cleaners, step one–10 seconds and zero dollars–would be simply ripping or cutting out the silencer tab. Beyond that, you could obtain a factory low-restriction air cleaner setup, or a good aftermarket one. Next up the food chain, you could fabricate a cold-air system. Forget ram air – that’s pure BS at any realistic speed. But cold air makes real HP. We’ve used a semi-bolt-on setup from Air Inlet Systems (Hamilton, Ontario) with great success.
Thanks to a dyno run, we found out that our stock 4.0L’s calibration was way too fat at WOT. No quick fix for that with factory injection, but with a carb, it’s easy. Having a wide-range O2 sensor, even temporarily, as a tuning tool, is awesome.
EXHAUST
This is one area that we really love to hop up! Why? Because, in addition to HP and torque gains, significant MPG gains can be had here. On classic Mopes, the first question is usually: Headers or manifolds? Really good hi-po headers, such as the awesome TTIs, are not cheap (but they are worth every penny). And, for a simple bolt-on, you really don’t need, or even want, a killer exhaust system. You want gas speed at midrange RPM. You need to decide, early-on, just how far you want to carry the bolt-on process. In many cases a small set of used headers will be the way to go. In other situations, a set of small Tri-Ys, which are the headers of choice for torque, will be the answer–Schumacher for big-blocks, and Layson’s for smallblocks.
You might also decide to stay cast iron. In that case, the best factory manifolds for your engine, that will also fit your chassis, would be a nice upgrade, if the price is right. Do your homework.
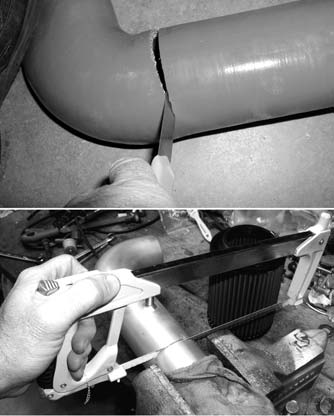
From there back, there’s myriad choices. The key, again, is moderation: No 3″ duals on a 318! For many newer Mopars, there’s a host of cat-back systems available. For our Jeep test mule, we spotted some really awesome systems in various catalogs. One minor problem: They cost $600 or so – and that’s for a single-pipe setup! We eventually settled on a $125 Walker Dynomax system from Summit (see pix for details). We were kind of bummed to be replacing our stock “lifetime stainless steel” system with lowly aluminized. Yeah, until we had the stock system out on the floor,and saw the massive rust–the side of the muffler had a 10-inch rust gash.
You can sometimes do just as well by having a system fab’d locally. Ask around, most towns have at least one shop with a skilled guy who’s not afraid to be creative. However, pointing him in the right direction helps. if you’re staying single exhaust, for instance, and your engine has two outlets (a V8 or I-6 with split manifolding, as on our Jeep), then the 2-into-one merge point is extremely critical. Some factory systems were very, very bad here. A good collector, such as the ones made by Flowmaster, are a big plus all across the RPM range.
THE BOTTOM LINE
Bolt-ons work.
Driving the test mule Jeep Cherokee with the bolt-ons isn’t radically different than stock. The throttle response is noticeably crisper, owning, no doubt, to the additional air being admitted for the same ‘x’ pedal travel. The totally unsilenced air cleaner, depending on the position of the AIS motor’s pintle, sometimes permits a quite audible hiss to be heard at idle. The exhaust is a bit throaty at idle and when heard outside the car. Inside, there’s a nice rumble at WOT, but cruise noise levels seem unchanged.
A dyno test proved that we increased our Jeep’s torque and HP output by better than 10%. As a bonus, a careful (but admittedly not double-blind scientific) logging of fuel economy, with our usual 50-50 mix of suburban traffic and 80 MPH interstates, showed a fuel economy improvement from 20.7 to 22.1 MPH. Assuming 15,000 miles a year, that equates to 46 gallons less annually. At $2.75 a gallon, that’s $126 a year less going to our nice Saudi and Venezuelan friends. If we get another 75K out of the Jeep, we’ll have saved over $600 enough to pay back the mods. And we’ll have been enjoying the extra power and throttle response all the while.
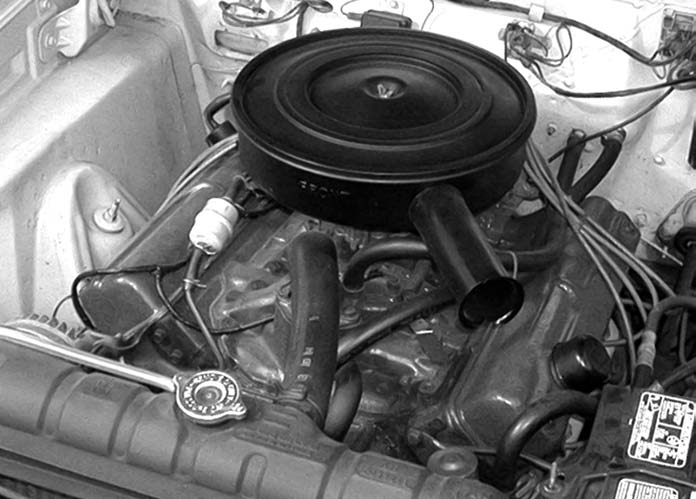
applied can wake up any Mopar—even a
dead-stock 318 poly.
spark advance, and enough spark energy.
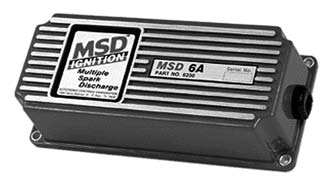
Stock electronic ignition is fine up to
~600HP! But if you’re converting from
breaker points, you might as well go for
something good, like an MSD box.
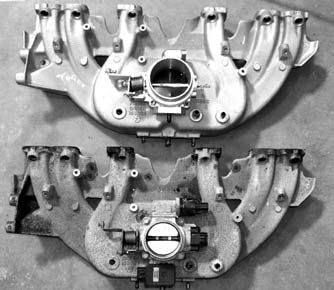
larger throttle body—a CNC’d billet
66mm. from F&B, replacing the stock 60
mm. On our 4.0L, this required a bored
intake manifold, which we did to a spare
(junkyard) piece so we wouldn’t be off the
road at all.
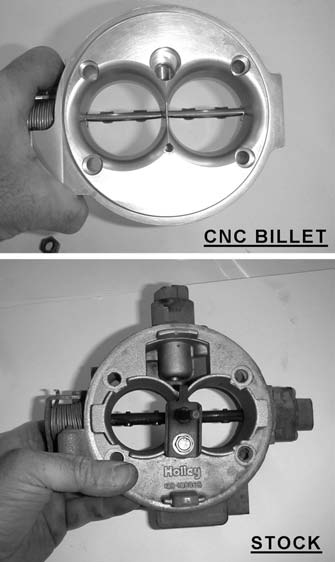
billet units on a 318 Magnum, so we knew
their stuff was well engineered to bolt on
with no hassles. We also knew it made
HP!

Bbl swap will wake things up. But the key
is to avoid excesses. Either a demand type
carb (AVS, T-Q) or a really small
vacuum-secondary 4-Bbl, such as this
Holley 570 CFM unit, is the way to go.
Manifold’s gotta be dual plane—even an
OEM cast-iron one is fine.

dismal on factory low-po engines. One of
the worst parts of our Jeep’s setup was
the turbulence-inducing ribbed hose.

this puny, weak-sister little rectangular
“snout”.
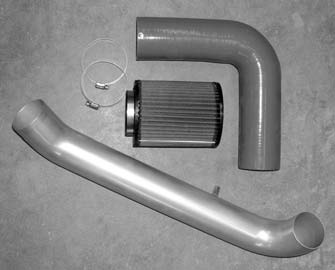
“ricer” air cleaner, and some rubber or
silicone and steel (think: exhaust tubing)
or aluminum piping, you can rig up a low
restriction setup for EFI cars on the
cheap.
about 15 minutes.
One thing we’re considering: an added
heat-deflector panel—a simple aluminum
sheet (Home Depot) to shield the air filter
from picking up hot radiator air.
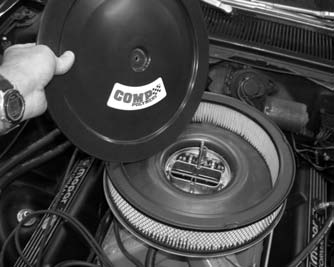
should definitely ditch a stock single snorkel
air cleaner for a good open element
unit. This composite one from
Comp Cams has been one our favorites
for years.
airbox for true cold-air induction. Real HP
is waiting.
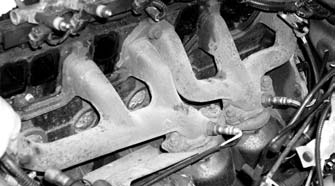
exhaust manifolds to be pretty good, so
we made no changes there.
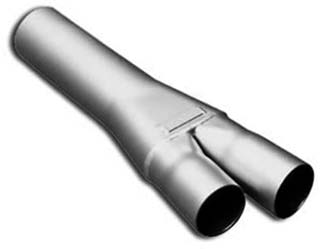
exhaust, a good 2-in-1 collector, such as
this one from Flowmaster, really helps.
Most of the ’60s and ’70s factory Y-pipes
were pretty dismal. Some of the few
decent OEM Mopar setups we’ve ever
seen were on 273-4 A-bodies (’65-’67) and
’92-’93 318 Magnums.

2.25˝, which we judged adequate. But, at
many points, it was “crushed” (crimped,
no doubt, as part of the manufacturing
process) down to barely over 2.0˝. Bad.
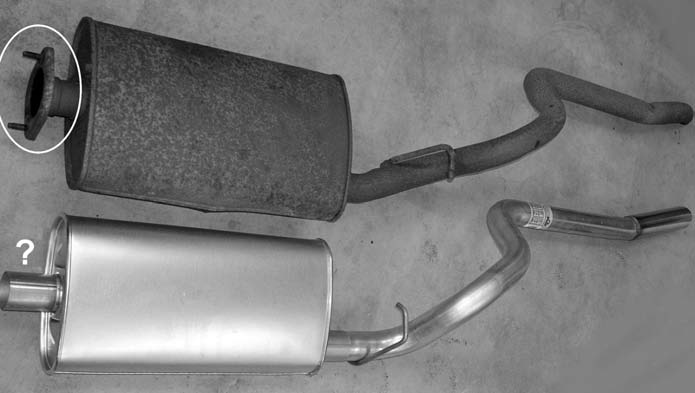
all points—the pipes are apparently mandrel-bent. It was claimed to bolt in our 2000
Cherokee. Not! We hadda cut the cat flange off the OEM “stainless” system (maybe it
doesn’t stain, but it sure rusts!) and weld it on to the Dynomax setup. This is the kind of
hassle that can turn your afternoon bolt-on session into an exercise in frustration. Plan
ahead, check everything before twisting wrench one. Ironically, the throttle body, from a
tiny CNC house, fit like a glove with zero hassles, yet the product of a multi-million-dollar
conglomerate was a hack job. Still, once installed, the outcome was quite positive, and
the Dynomax setup costs about half what a new, stock OEM setup goes for.
treadle of a local dyno shop. With just a
few hour’s work, we picked up 17 RWHP
and 19 ft./lbs.—this is the equivalent of
approximately 22 HP at the crankshaft.
There was another plus—a fuel economy
improvement. Downsides were limited to
an induction hiss at idle (at times when
the AIS motor was nearly closed), and a
throaty growl from both the intake and
exhaust at wide-open throttle. At highway
cruise speeds, the interior noise level was
essentially stock.

us—by way of a wide-range O2 sensor—
was that the factory computer calibration
is pig-rich at wide open throttle. (Yes, we
check part throttle, so we knew, by way
of the 14.7:1 readings, that everything is
working as-designed.) The factory
probably does this to protect the
catalysts against meltdown—but, gee,
10:1? This is one area where carbs are
much easier than factory injection: Just
jet down as required