Disc-O-Tech Race Calipers
RACE CALIPERS
Text and Photos
by Richard Ehrenberg
RACE CALIPERS
The DISC-O-TECH swap has one main problem for race cars: the unsprung weight problem. The rotors themselves, in the 11.75″ size, weigh in at a none-too-svelte 27 pounds. But, okay, this mass at least serves a useful purpose: as a heat sink for the heat generated by the braking friction, and adding anti-warp beef. So we can live with that. But the calipers, even fitted with the lightweight plastic pistons, complete with a pair of pads and the adapter brackets, are a brutal 14-1/2 pounds – and this is also ugly unsprung weight.
Click On Pictures To Load Full Size
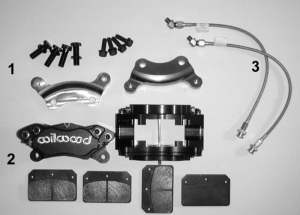
AR’s engineered parts include (1) the adapter brackets, which are a masterpiece of CNC machining, and the related hardware. Wilwood supplies the calipers and pads (2), while the hoses (3) are Goodridge (inferior preproduction hoses are shown here.)
While we were sulking about this, out on the left coast, up Portland way, longtime Mopar Action reader Andy Finkbeiner was actually doing something about it. He specÂ’d out a pair of Wilwood calipers that have approximately the same pad and piston area as the OEM Mopar single-piston setups, but are a lightweight, 4-piston aluminum design. And, in a fortuitous happenstance, they are available for the same 1.00″ thick rotors that are used on all A, B, and E-body single piston setups. So Andy went ahead and tooled up to produce an awesome pair of adapter brackets that allow the Wilwoods to bolt on to all stock ‘73-up Mopar passcar knuckles, right though the last rear-drivers in 1989 (except C-bodies, natch.) If you have the smallish 10.87″ rotors, youÂ’ll need to swap on a set of the 11.75s first. And, since our DISC-O-TECH, uses the aforementioned ‘73-74 E, ‘73-76 A-body knuckles, by installing a set of a set of those, these killer brakes can be used on durn near any Mopar back to the early 60s. Happily, due to the reduced bulk of the Wilwood calipers, some factory 14-inch wheels will fit and – yes, clear 11.75″ the big brakes (although some variations may require a thin wheel spacer.) And, to further sweeten the pie, the smaller calipers will relieve swaybar interference that plagued many ‘60s swaps.
But why not a complete Wilwood disc brake kit? Mainly, the hubs are aluminum, definitely not the street deal, and even their H.D. rotors are only 10.75 x 0.81″ – not even nearly as beefy as stock small-rotor, single-piston Mopar brakes.
The key to this swap is a bulletproof CNC machined, nickel-plated billet 1018 steel adapter which allows the lightweight, 4-piston Wilwood billet Dynalite calipers to simply bolt on. These have been CAD-designed (using the ProE cad system and then stress and strain analyzed using the Mechanica finite element program,) and Andy has arranged for them to be available to all M.A. readers through his authorized dealers (see source) who will supply them complete with all required hardware, including ARP fasteners for the critical adapter-to-knuckle locations. The kit was nearing production when we scored a prototype, which used a rather sleazy hose setup, but since then, Finkbeiner has searched a top- quality truly streetable DOT-style hose package, (see Hose Job for ordering information.)
Not all of AR’s dealers sell the calipers, so youÂ’ll probably wind up calling one of the mail order houses such as Summit or JegÂ’s. Ask for a pair of number 120-5094 calipers, and a set of pads, the best street / track compromise seemingly being the Polymatrix set, number 15D-4331K. The total for this stuff should be in the $300 range.
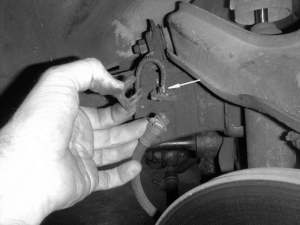
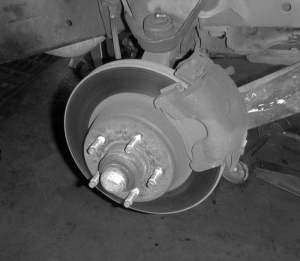 The starting point is any A, B, E, F, J, M, or R-body with knuckles that accept production Unicast (one-piece, rotor and hub) calipers. If the car presently has the nominal 11″ (Actual 10.875″) rotors, youÂ’ll need to swap on the 12-inches (actual 11.75″). Need a pair of rotors, but you say youÂ’re not sure which ones to buy? Okay, Vern, weÂ’ll make it a no-brainer: Ask the main for a pair of rotors for a 1979 Chrysler Cordoba. They bolt on, same bearings, etc. If you have a pre-‘73 car, and have not yet performed the killer M.A. disc-brake swap, youÂ’ll need to perform at least the knuckle part of that deal – see text.Time to get greasy! Get the car safely up on stands, then block the brake pedal down at least a half-inch to prevent draining the master cylinder. Next, remove the tubing nuts from the hoses using a flare-nut (refrigeration) wrench, and pull out the clip as shown. HereÂ’s a tip: if the nut is seized in the tubing, do not just keep twisting – the tubing will break. Instead, soak the fitting with the essence of my ex-wife (Liquid Wench) for a few hours. Then turn the nut only about 1/8-turn back and forth repeatedly until the nut is free to rotate.
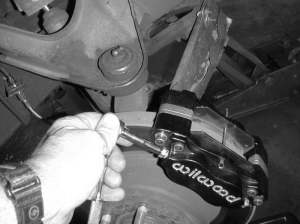
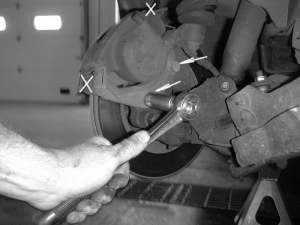 Now remove the caliper-adapter bolts (arrows). No need to remove the caliper-to-adapter hardware (XÂ’s), be they pin or clamp type.Lift away the entire caliper, adapter, an hose assembly. Swap-meet bait!
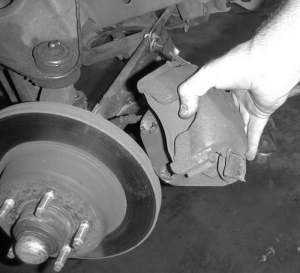
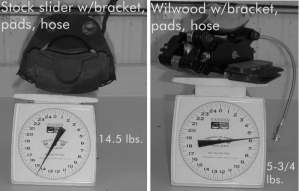 Put the iron beast on the scale if youÂ’re curious. Light, it isnÂ’t. The Wilwood setup, also with pads and hoses, is a solid nine pounds per side lighter. And thatÂ’s all unsprung weightThe New setup bolts on very similarly to the old stuff. Torque bracket bolts to 95 ft-lbs, and caliper bolts to 30.
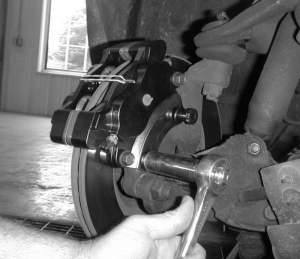
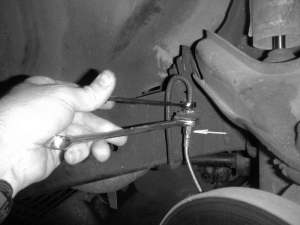
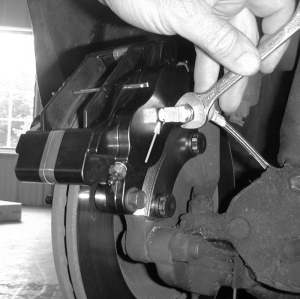 Cover the pipe threads (only!) on the adapter with a few turns of Teflon pipe tape, then screw it into the caliper and tighten, being sure that it faces approximately rearward. DonÂ’t go crazy – remember, itÂ’s pipe thread! Now screw the hose onto the elbow and tighten. The new Goodridge parts may look a bit different than whatÂ’s shown here, which are early prototype pieces.At the frame end, tighten the flex line and the steel line both to the adapter nut, being sure to use wrenches as required, and not putting a twist into either line. Reinstall the clip
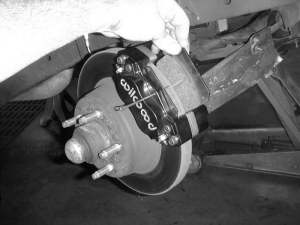 Slip the pads into place. If you can put a bagel into a toaster, youÂ’ve got it covered. Then slip the cotter pin in, and bend the inner end a bitThe Wilwood calipers have four bleeder screws; you only need to bleed the top pair. Note that they seat into replaceable brass fittings, way cool. Nothing special required in the bleeding procedure.
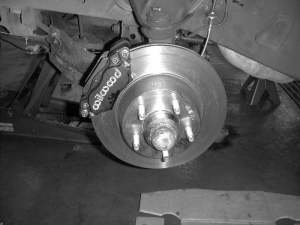 All done! Be sure to make a few low-speed stops to test system integrity, or have your Mother-in-law stand in front of the car. Then bed in the pads per Wilwood instructions, which are the standard “fade them moderately, then let ‘em cool” deal.One thing we like to do is install longer studs and flared, 13/16″ nuts. The studs we use, Dorman p/n 610-290, are hardened (grade 8,) 1/2″ longer threaded length than stock, for use with thick-center alloy wheels, and have a dog point to put an end to cross threading. The nuts, 611-093, having a wide flared cone to resist wheel pull-through much better than stockers and take a 13/16″ socket.
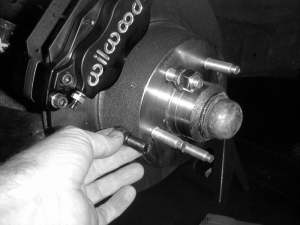
Speaking of streetable, how about those Wilwood calipers? After all, they have no environmental seals (“boots”) to keep dirt, salt, mud, cockroaches, dead chickens, etc., out of the seals, so Wilwood, ever mindful of the hoards of product-liability attorneys, smelling easy money and chafing at the bit, sells them labeled for off-road use only. But the boots on stock calipers catch on fire under extreme duty anyway, so the lack of boots may not be such a bad thing. And the only time that dirt could really contaminate the seals is during a piston push-back, to install new pads. A few preemptive squirts of Brakleen should preclude this problem; at any rate, the pistons and seals are fairly well shrouded, so, unless you live at the bottom of a toilet bowl, this shouldn’t be much of a problem. Our view: fine for “3 season” cars, but maybe not for your 30,000-mile-a-year daily driver.
The same applies to the pads. The Wilwoods are nearly as big (in area) as stock pads, but quite a bit thinner. Expect the Polymatrix pads that Wilwood recommends for our usage to be good for maybe 7,500 – 10,000 miles of pad wear. Mitigating this is their reasonable price and amazingly easy change-out procedure.As usual, weÂ’re covering the actual hands-on greasy-hands stuff in a set of razor-sharp photos and captions. After you get the kit bolted up, all that will be left is to dial in the proportioning as outlined above. And, make no mistake about it, you will need to do some “dialing”. Depending on what you had originally up front, youÂ’ll probably either have a little too much rear bias, or way too much.
Text and Photos
by Richard Ehrenberg
THIS ENTIRE WORK COPYRIGHT 1990-2005 BY RICHARD EHRENBERG AND HARRIS PUBLICATIONS, INC.
Protected under Pan-American and international copyright conventions.
Printing, publishing, distributing, copying, etc., by any means, electronic or otherwise,
Is strictly prohibited.


Comments are closed.